Homelab - 2 - From Bare Metal to a Bootable Cluster Node
- Introduction
- 1 - Why Rebuild from K3s
- 2 - The Hardware
- 3 - Why Automated Provisioning
- 4 - Ventoy: One USB to Rule Them All
- 5 - Ubuntu Autoinstall and cloud-init
- 6 - The user-data File
- 7 - WiFi: The Annoying Part
- 8 - Hostname Troubles with the ISP Router
- 9 - The kuadm User
- 10 - Keep Laptop alive when closed
- 11 - Lessons Learned
- Conclusion
Introduction
After writing the first article about my initial homelab with K3s and Flux, I kept running it for a while. It worked. But the more I used it, the more I felt I was lacking control. K3s is great — opinionated, batteries-included, easy to install — but it hides a lot of what actually makes Kubernetes tick. I wanted to rebuild everything from scratch using kubeadm and Kubespray for a more production-like setup. This series documents that rebuild journey.
Before getting to the Kubernetes part, though, there’s a step that most tutorials skip over: actually installing the operating system on each machine. It sounds trivial until you have three different laptops with different hardware, no monitor to plug in, and a strong desire to never touch a keyboard during installation.
This article covers exactly that — the OS layer. How I went from three blank machines to three identical, network-reachable Ubuntu nodes, provisioned automatically from a single USB drive and a single configuration file.
It’s less glamorous than deploying workloads, but getting this right is what makes everything else reproducible. If you ever have to rebuild a node at 11pm because something went wrong, you’ll be glad you automated this part.
1 - Why Rebuild from K3s
The first homelab was built with K3s. It worked, Flux was running, applications were deployed. I was happy.
But as I dug deeper into Kubernetes at work and kept reading about how things actually work under the hood, I started noticing how much K3s abstracts away. Everything is in a single binary. The embedded database, the built-in service load balancer, the way it bundles containerd and the CNI plugin — all of that is genuinely convenient, but it means you’re not really learning the raw Kubernetes primitives.
I passed my CKA in September 2025, so I learned how to work with kubeadm, etcd… And I loved working directly with these tools and learn all the components of a kubernetes cluster.
So I wanted to migrate from K3S to control everything in my cluster.
I wiped everything and started fresh. kubeadm for cluster initialization, Kubespray to automate the deployment across all three nodes with Ansible.
The first thing that needed solving before any of that: a clean, consistent, reproducible OS on each machine.
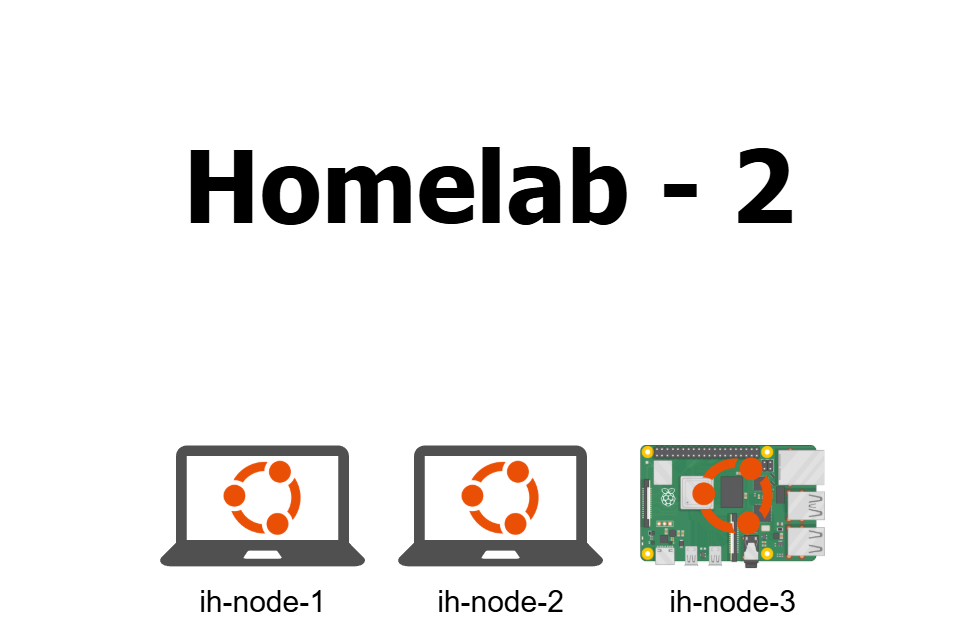
2 - The Hardware
The cluster is still the same three machines from the first setup.
- RaspberryPi: A Raspberry Pi 5, 16 GB RAM, 4 cores. The workhorse of the cluster and the control plane node.
- Archy: An old laptop rescued from my parents’ house, 8 GB RAM, 4 cores. Was running Arch Linux before. Now running Ubuntu Server like the others.
- Ubuntuserv: Another old laptop, 4 GB RAM, 4 cores. Was already running Ubuntu Server.
Don’t pay attention to the names. I’m aware they are not consistent with each other. I named them before I cared about naming conventions.
The important thing here is that all three machines are different hardware. Different WiFi chipsets, different BIOS versions, different interface naming conventions. That heterogeneity is what makes automation both more useful and more painful to set up correctly.
3 - Why Automated Provisioning
The obvious answer is: because doing things manually three times is three times more error-prone than doing them automatically once.
But there’s a deeper reason. When you provision nodes manually — clicking through an installer, setting a hostname, creating a user — you end up with machines that are probably similar but not definitely identical. Did you create the same user on all three? Did you enable SSH on all of them? Did you set the same locale? You think so, but you’re not sure.
With automated provisioning, the configuration is a file. The file is the truth. If the three nodes were all installed from the same file, they are identical by construction.
This also means that when something breaks — and something always breaks — you can rebuild a node in the time it takes the installer to run. No manual steps to remember, no documentation to consult. Boot, wait, done.
For a homelab this is a quality-of-life improvement. In a real environment this is a requirement. I’d rather practice the good habits now.
4 - Ventoy: One USB to Rule Them All
In the first homelab setup I used Rufus to flash the Raspberry Pi’s SD card. Rufus writes a single ISO to a drive and that’s it. If you want to try a different ISO you reformat and reflash.
This time I switched to Ventoy. Ventoy formats the USB drive once, and then you just copy ISO files onto it like a regular filesystem. When you boot from the drive, Ventoy shows a menu and lets you pick which ISO to boot. No reflashing, no reformatting.
For provisioning three machines with the same ISO it doesn’t make an enormous difference. But when you’re also carrying around a rescue ISO, a diagnostic tool, and your installer, having them all on one stick is genuinely useful.
The setup is simple: download Ventoy, run the installer targeting your USB drive, then copy the Ubuntu Server 24.04 ISO to the drive’s data partition. That’s it.
Secure Boot Issue
The first time I booted from the Ventoy drive on one of the laptops I got this error:
Verification failed: (0x1A) Security ViolationThis is a Secure Boot issue. Ventoy’s bootloader isn’t signed by Microsoft’s key by default, so UEFI refuses to run it. The fix is to enroll Ventoy’s own certificate into the UEFI Secure Boot database, which Ventoy can do for you through its VentoyEnroll utility. There’s a clear guide on the Ventoy website for this.
Alternatively you can just disable Secure Boot in the BIOS. Less elegant but faster for a homelab that you control entirely.
The Raspberry Pi Exception
The Raspberry Pi doesn’t have a standard UEFI boot system, so Ventoy doesn’t work on it. This is not a problem in practice: the Raspberry Pi Imager does the same job. It lets you configure the hostname, inject an SSH key, and set up WiFi before writing the image to the SD card.
The only difference is that I use a SSD directly instead of an SD Card more suited for a Kubernetes cluster. The result is equivalent — a headless, network-reachable node without manual setup.
5 - Ubuntu Autoinstall and cloud-init
Ubuntu Server 24.04 ships with a built-in installer called autoinstall. It reads a configuration file called user-data and runs the installation completely hands-off. No clicking, no prompts, no keyboard interaction.
The user-data file uses the cloud-init format. It covers everything: disk layout, locale, keyboard, user accounts, SSH keys, packages to install, and arbitrary files to write to disk before first boot.
The way it works with Ventoy is straightforward: you place the user-data file at the root of the USB drive alongside the ISO. When the Ubuntu installer boots, it looks for this file and uses it automatically. The installer runs, the node reboots, and you have a configured machine.
There’s an alternative approach where you serve user-data over HTTP and pass a kernel parameter at boot:
autoinstall ds=nocloud-net;s=http://<your-server>/This is cleaner for large-scale deployments but requires a running HTTP server. For three nodes, putting the file on the USB stick is simpler.
The whole design goal was to have a single user-data file that works on all three machines, with only the hostname changed between installs. Everything else — the user, the SSH key, the WiFi config, the packages — stays the same.
6 - The user-data File
Here is the structure of the user-data file I ended up with. I’ll walk through each section.
#cloud-config
autoinstall:
  version: 1

  locale: fr_FR.UTF-8
  keyboard:
    layout: us
    variant: intl

  identity:
    hostname: ih-node-1
    username: kuadm
    password: "<hashed-password>"

  ssh:
    install-server: true
    authorized-keys:
      - "ssh-ed25519 AAAA... your-key-here"
    allow-pw: false

  storage:
    layout:
      name: direct

  packages:
    - wpasupplicant

  write_files:
    - path: /etc/netplan/99-wifi.yaml
      content: |
        network:
          version: 2
          wifis:
            wlan0:
              dhcp4: true
              access-points:
                "YourSSID":
                  password: "YourWiFiPassword"

  kernel:
    cmdline: "net.ifnames=0 biosdevname=0"

  late-commands:
    - "echo 'kuadm ALL=(ALL) NOPASSWD:ALL' > /target/etc/sudoers.d/kuadm"
Let me go through the key decisions here.
Storage Layout
I used direct layout, which writes directly to the whole disk without LVM. LVM adds flexibility for resizing volumes later, but for a homelab node with a single disk and only Kubernetes on it I don’t need that complexity. Simpler is better.
Locale and Keyboard
locale: fr_FR.UTF-8
keyboard:
  layout: us
  variant: intl
I’m French, so fr_FR.UTF-8 is my locale. But my keyboard is a US International layout, which is what I’ve been using for years. This is a subtle distinction that matters: locale controls date formats, number separators, and language defaults, while keyboard layout controls what characters the keys produce. Having them aligned correctly avoids annoying surprises.
Packages
packages:
  - wpasupplicant
Only one extra package is needed at install time. More on why in the next section.
Kernel Command Line
kernel:
  cmdline: "net.ifnames=0 biosdevname=0"
This is important. More on this in the WiFi section too.
Passwordless Sudo
late-commands:
  - "echo 'kuadm ALL=(ALL) NOPASSWD:ALL' > /target/etc/sudoers.d/kuadm"
The late-commands block runs after the installer has finished but before the first reboot. I use it to drop a sudoers file granting kuadm passwordless sudo. This is what Kubespray’s Ansible playbooks expect — they connect via SSH and run privileged commands without password prompts.
7 - WiFi: The Annoying Part
The nodes have no wired connection to the router. There’s no network switch in my setup. Everything runs over WiFi. This is fine for a homelab, but it created two separate problems during provisioning.
Problem 1: wpasupplicant Is Not Installed by Default
Ubuntu Server’s minimal install doesn’t include wpasupplicant, the package responsible for WPA2 WiFi authentication. Without it, the system can’t connect to a WiFi network at all.
This creates a chicken-and-egg problem: the installer needs a network connection to download packages, but WiFi doesn’t work until wpasupplicant is installed.
The workaround: during installation, plug the machine in via Ethernet so the installer has a network connection. This lets it download and install wpasupplicant. Once the installation is done and the machine reboots, WiFi works — because the package is now installed and the Netplan config is in place.
It’s not elegant. But it only needs to happen once per node, and a single Ethernet cable moved between machines is acceptable.
Problem 2: Interface Names Change Between Machines
Ubuntu by default uses “predictable” network interface names like enp3s0 for Ethernet or wlp13s0 for WiFi. The “predictable” part means the name encodes the PCI bus topology of the device.
The problem with three different laptops is that each one has a different bus topology, so each one gets a different WiFi interface name. wlp13s0 on one machine, wlp0s20f3 on another. This makes it impossible to write a single Netplan config that works on all of them.
The fix is to disable predictable naming entirely by passing kernel parameters at boot:
net.ifnames=0 biosdevname=0With these flags, the kernel falls back to the old-style names: eth0 for the first Ethernet interface, wlan0 for the first WiFi interface. These are consistent across all three machines regardless of hardware differences.
In the user-data file, this is set via the kernel.cmdline field:
kernel:
  cmdline: "net.ifnames=0 biosdevname=0"
And the Netplan config in write_files uses wlan0 directly:
write_files:
  - path: /etc/netplan/99-wifi.yaml
    content: |
      network:
        version: 2
        wifis:
          wlan0:
            dhcp4: true
            access-points:
              "MyNetwork":
                password: "MyPassword"
One config, three machines. This is why the README lists this as a deliberate design decision: consistent interface names are what make the single-file approach viable.
8 - Hostname Troubles with the ISP Router
Hostnames
I decided to name the nodes as follows:
ih-node-01ih-node-02ih-node-03
ih for Issam Homelab. Simple, consistent, clear.
The problem is my ISP-provided router. It has a quirk: it strips leading zeros from hostnames. So ih-node-01 gets registered in the router’s DNS as ih-node-1. The hostname on the machine is ih-node-01, but to reach it from another machine on the network you have to use ih-node-1.
I don’t get to control this on my router directly because it’s a grand public router… Big Up to my ISP provder
This inconsistency annoyed me more than it probably should have. Using ih-node-01 in Ansible inventory, SSH configs, and kubeconfig but having to use ih-node-1 for actual DNS resolution is the kind of thing that causes mysterious failures at 1am.
I could have worked around it by editing /etc/hosts on every machine to add the correct mappings. But that’s a manual step that needs to be repeated every time a new machine joins the network, and it defeats part of the purpose of automation.
The simpler fix: just rename the nodes to ih-node-1, ih-node-2, ih-node-3. No leading zeros. Now the hostname on the machine matches what the router resolves. Consistency restored.
Fixed IPs
The ISP router also doesn’t offer much in the way of automation. To assign static IPs to the nodes, I had to do it through the router’s web interface, reserving a DHCP lease for each node’s MAC address. This is a manual step that I couldn’t automate from the user-data side.
It’s a one-time operation per node, and the result is stable: each node always gets the same IP, which is what Kubernetes requires for a reliable cluster.
9 - The kuadm User
Every node gets a single user: kuadm.
The name is a deliberate near-homophone of kubeadm, the Kubernetes bootstrapping tool. It’s also the user that Kubespray’s Ansible playbooks expect to find when connecting to the nodes via SSH.
The user is created by the autoinstall identity block:
identity:
  hostname: ih-node-1
  username: kuadm
  password: "<hashed-password>"
The password hash is generated with:
openssl passwd -6This produces a SHA-512 salted hash that cloud-init accepts. The actual password doesn’t matter much because password login over SSH is disabled anyway:
ssh:
  install-server: true
  authorized-keys:
    - "ssh-ed25519 AAAA..."
  allow-pw: false
Only key-based authentication is allowed. The authorized key is my workstation’s SSH public key, baked into the user-data file. After installation, I can ssh kuadm@ih-node-1 from my workstation without a password prompt and without needing to copy any keys manually.
The passwordless sudo grant in late-commands completes the picture:
echo 'kuadm ALL=(ALL) NOPASSWD:ALL' > /target/etc/sudoers.d/kuadmKubespray runs many Ansible tasks as root via sudo. Without passwordless sudo, every task would require a password prompt, which doesn’t work in an automated playbook.
10 - Keep Laptop alive when closed
One more thing worth mentioning: all three machines are laptops (one is a raspberrypi). They run headless. I added the following configuration after the first install to make sure they don’t suspend when I close the lid:
/etc/systemd/logind.conf:
HandleLidSwitch=ignore
HandleLidSwitchExternalPower=ignore
HandleLidSwitchDocked=ignore
Then restart the service:
sudo systemctl restart systemd-logindWithout this, closing the lid to tuck the machine away puts the node to sleep and the cluster falls apart. Learned that one the hard way.
11 - Lessons Learned
Running through this process across three different machines taught me a few things worth writing down.
Heterogeneous hardware is harder than it looks. The three laptops have different WiFi chips, different BIOS quirks, different boot behavior. Things that work on one machine don’t always work on another. The interface naming problem is a good example — it only becomes visible when you try to apply the same config to two different machines.
The Ethernet-first approach is a real limitation. Having to plug in an Ethernet cable to bootstrap WiFi is clunky. A cleaner solution would be to pre-download the wpasupplicant package and include it in a local mirror, or to serve the user-data from a PXE server that also handles the network config. For three nodes, the Ethernet workaround is fine. For more nodes it would get tedious fast.
One file, one source of truth. The decision to use a single user-data file for all three nodes — changing only the hostname — was the right call. Every difference between nodes is deliberate and visible. There’s no risk of accidentally configuring node 2 differently from node 1 because you edited the wrong copy.
Don’t skip automating the OS layer. It’s tempting to just click through the installer once and move on. But the OS layer is the foundation. If it’s inconsistent, everything built on top of it will have subtle, hard-to-debug differences. Taking the time to automate it properly means every rebuild is guaranteed to be clean.
The ISP router is a constraint, not a tool. Home ISP routers are not designed for infrastructure work. They have weird behaviors, limited features, and no API. The hostname stripping issue is just one example. Working around it by changing the naming convention rather than relying on the router to behave correctly was the right instinct. When in doubt, don’t rely on things you can’t control.
Conclusion
The next article will cover what happens after the machines are up: running Kubespray to bootstrap the Kubernetes cluster, configuring Calico for networking, and the various things that went wrong along the way.
The OS installation is the boring foundation. The cluster setup is where things get interesting.